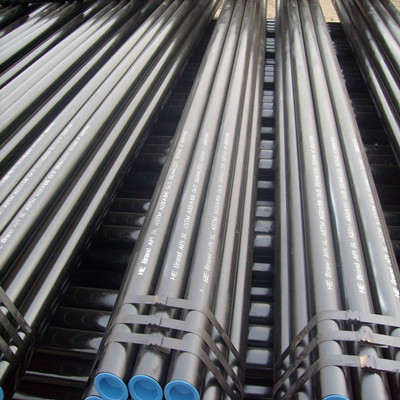
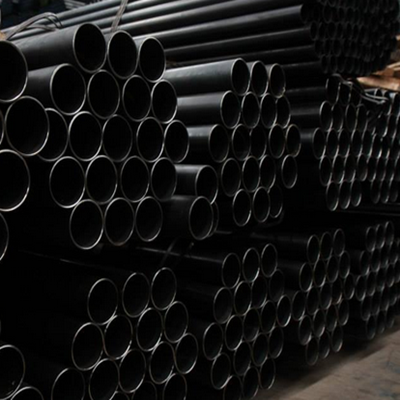
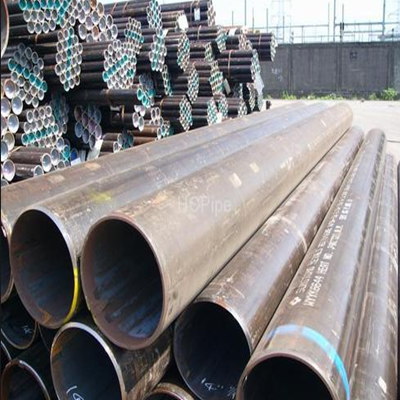
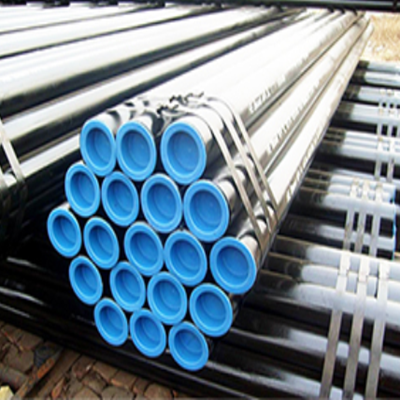
ASTM A333 Grade 1 Low-Temperature Seamless Steel Pipe
- ASTM A333/ASME SA333
- China
- Stock,Production
- Grade 1
ASTM A333 Grade 1 Steel Pipe is suitable for -45 ~ -195 ~ C low temperature pressure vessel pipes and seamless steel tubes for low temperature heat exchanger pipes.
ASTM A333 Grade 1 Low-Temperature Seamless Steel Pipe
ASTM A333 Grade 1 Low-Temperature Seamless Steel Pipe
ASTM A333 Grade 1 Steel Pipe is suitable for -45 ~ -195 ~ C low temperature pressure vessel pipes and seamless steel tubes for low temperature heat exchanger pipes.
ASTM A333 Grade 1 is a grade of ASTM A333 Standard.ASTM A333 Standard Specification for Seamless and Welded Steel Pipe for Low-Temperature Service and Other Applications with Required Notch Toughness.
ASTM A333 Grade 1 Low-Temperature Seamless Steel Pipe Quick Details
Company Name: beite steel pipe
Country/Region: China
Product Name:ASTM A333 Grade 1 Alloy Steel Pipe
FOB Price: US $1300-2600 / Ton | 1 Ton/Tons (Min. Order)
Port of Shipment:Tianjin,China
Payment:L/C or T/T
Delivery: 7-15 days after payment
Package:Standard export package,suit for all kinds of transport, or as required.
ASTM A333 Grade 1 Steel Pipe Dimensional Range & Specification
Outside Diameter:20 – 215mm
Wall thickness:2mm——15mm
Length:6000mm、12000m or specified length as required.
Materials and Manufacture
Manufacture—The pipe shall be made by the seamless or welding process with the addition of no filler metal in the welding operation.
For the seamless process only, reheat and control hot working and the temperature of the hot-finishing operation to a finishing temperature range from 1550 to 1750°F [845 to 945°C] and cool in air or in a controlled atmosphere furnace from an initial temperature of not less than 1550°F [845°C].
Heat Treatment:
Normalize by heating to a uniform temperature of not less than 1500°F [815°C] and cool in air or in the cooling chamber of an atmosphere controlled furnace,reheat to a suitable tempering temperature.
For the seamless process only, reheat and control hot working and the temperature of the hot-finishing operation to a finishing temperature range from 1550 to 1750°F [845 to 945°C] and cool in air or in a controlled atmosphere furnace from an initial temperature of not less than 1550°F [845°C].
Seamless pipe of Grades 1 may be heat treated by heating to a uniform temperature of not less than 1500°F [815°C], followed by quenching in liquid and reheating to a suitable tempering temperature
The test pieces shall be gradually and uniformly heated to the prescribed temperature, held at that temperature for a period of time in accordance with Table 1, and then furnace cooled at a temperature not exceeding 600°F [315°C]. Grade 8 shall be cooled at a minimum rate of 300°F [165°C]/h in air or water to a temperature not exceeding 600°F [315°C].
Table 1 Stress Relieving of Test Pieces
| Metal Temperature (A , B) |
Minimum Holding Time, h/in. [min/mm] of Thickness |
|
| Grades 1 | ||
| °F | °C | |
| 1100 | 600 | 1 [2.4] |
| 1050 | 565 | 2 [4.7] |
| 1000 | 540 | 3 [7.1] |
Chemical Composition
ASTM A333 Grade 1 Low-Temperature Seamless Steel Pipe Chemical Composition(%)
| Grade | Chemical Composition(%) | ||||||||||||
| C | Mn | P | S | ||||||||||
| Grade 1 | ≤0.30 | 0.40-1.06 | ≤0.025 | ≤0.025 | |||||||||
When Grades 1 are ordered under this specification, supplying an alloy grade that specifically re- quires the addition of any element other than those listed for the ordered grade in Table 1 is not permitted. However, the addition of elements required for the deoxidation of the steel is permitted.
Product Analysis
At the request of the purchaser, an analysis of one billet or two samples of flat-rolled stock from each heat or of two pipes from each lot shall be made by the manufacturer. A lot of pipe shall consist of the following:
| NPS Designator | Length of Pipe in Lot |
| Under 2 | 400 or fraction thereof |
| 2 to 6 | 200 or fraction thereof |
| Over 6 | 100 or fraction thereof |
Mechanical Properties
Tensile Requirements
| / | Grade 1 | |
| / | Ksi | Mpa |
| Tensile strength, min | 55 | 380 |
| Yield strength, min | 30 | 205 |
| Longitudinal | Transverse | |
| Elongation in 2 in. or 50 mm, (or 4D), min, %: | ||
| Basic minimum elongation for walls 5⁄16 in. [8 mm] and over in thickness, strip tests, and for all small sizes tested in full section | 35 | 25 |
| When standard round 2-in. or 50-mm gage length or proportionally smaller size test specimen with the gage length equal to 4D (4 times the diameter) is used | 28 | 20 |
| For strip tests, a deduction for each 1⁄32 in. [0.8 mm] decrease in wall thickness below 5⁄16 in. [8 mm] from the basic minimum elongation of the following percentage | 1.75B | 1.25B |
| Wall Thickness | Elongation in 2 in. or 50 mm, min, %C | ||
| Grade 1 | |||
| in. | mm | Longitudinal | Transverse |
| 5⁄16 (0.312) | 8 | 35 | 25 |
| 9⁄32 (0.281) | 7.2 | 33 | 24 |
| 1⁄4 (0.250) | 6.4 | 32 | 23 |
| 7⁄32 (0.219) | 5.6 | 30 | .... |
| 3⁄16 (0.188) | 4.8 | 28 | .... |
| 5⁄32 (0.156) | 4 | 26 | .... |
| 1⁄8 (0.125) | 3.2 | 25 | .... |
| 3⁄32 (0.094) | 2.4 | 23 | .... |
| 1⁄16 (0.062) | 1.6 | 21 | .... |
B The following table gives the calculated minimum values.
C Calculated elongation requirements shall be rounded to the nearest whole number.
Note:The preceding table gives the computed minimum elongation values for each 1⁄32in. [0.80mm] decrease in wall thickness. Where the wall thickness lies between two values shown above, the minimum elongation value is determined by the following equation:
| Grade | Direction of Test | Equation |
| 1 | Longitudinal | E = 56t + 17.50 [E = 2.19t + 17.50] |
| Transverse | E = 40t + 12.50 [E = 1.56t + 12.50] | |
|
where: E = elongation in 2 in. or 50 mm, in %, and t = actual thickness of specimen, in. [mm]. |
||
Impact Requirements
For Grades 1 the notched-bar impact properties of each set of three impact specimens, including specimens for the welded joint in welded pipe with wall thicknesses of 0.120 in. [3 mm] and larger, when tested at temperatures in conformance with 14.1 shall be not less than the values prescribed in Table .
TABLE Impact Requirements for Grades 1
| Size of Specimen, mm | Minimum Average Notched Bar Impact Value of Each Set of Three SpecimensA | Minimum Notched Bar Impact Value of One Specimen Only of a SetA | ||
| ft·lbf | J | ft·lbf | J | |
| 10 by 10 | 13 | 18 | 10 | 14 |
| 10 by 7.5 | 10 | 14 | 8 | 11 |
| 10 by 6.67 | 9 | 12 | 7 | 9 |
| 10 by 5 | 7 | 9 | 5 | 7 |
| 10 by 3.33 | 5 | 7 | 3 | 4 |
| 10 by 2.5 | 4 | 5 | 3 | 4 |
Workmanship, Finish and Appearance
The pipe manufacturer shall explore a sufficient num- ber of visual surface imperfections to provide reasonable assurance that they have been properly evaluated with respect to depth. Exploration of all surface imperfections is not required.
Surface imperfections that penetrate more than 12½ % of the nominal wall thickness or encroach on the minimum wall thickness shall be considered defects.
To provide a workmanlike finish and basis for evalu- ating conformance, the pipe manufacturer shall remove by grinding the following:
Mechanical marks, abrasions and pits, any of which imperfections are deeper than 1⁄16 in. [1.6 mm], and
Visual imperfections commonly referred to as scabs, seams, laps, tears, or slivers found by exploration in accor- dance with 10.1 to be deeper than 5 % of the nominal wall thickness.
Mechanical Testing
Sampling—For mechanical testing, the term “lot” ap- plies to all pipe of the same nominal size and wall thickness (or schedule) that is produced from the same heat of steel and subjected to the same finishing treatment in a continuous furnace. If the final heat treatment is in a batch-type furnace, the lot shall include only those pipes that are heat treated in the same furnace charge.
Transverse or Longitudinal Tensile Test and Flattening Test—For material heat treated in a batch-type furnace, tests shall be made on 5 % of the pipe from each lot. If heat treated by the continuous process, tests shall be made on a sufficient number of pipe to constitute 5 % of the lot, but in no case less than 2 pipes.
Hydrostatic Test—Each length of pipe shall be sub- jected to the hydrostatic test.
Impact Test—One notched bar impact test, consisting of breaking three specimens, shall be made from each heat represented in a heat-treatment load on specimens taken from the finished pipe. This test shall represent only pipe from the same heat and the same heat-treatment load, the wall thick- nesses of which do not exceed by more than 1⁄4 in. [6.3 mm] the wall thicknesses of the pipe from which the test specimens are taken. If heat treatment is performed in continuous or batch- type furnaces controlled within a 50°F [30°C] range and equipped with recording pyrometers so that complete records of heat treatment are available, then one test from each heat in a continuous run only shall be required instead of one test from each heat in each heat-treatment load.
Impact Tests (Welded Pipe)—On welded pipe
Impact Test
Except when the size of the finished pipe is insufficient to permit obtaining subsize impact specimens, all material furnished to this specification and marked in accordance shall be tested for impact resistance at the minimum temperature for the respective grades as shown in Table .
ASTM A333 Grade 1 Steel Pipe Impact temperature
| Grade | Impact temperature | ||||||||||||
| ℉ | ℃ | ||||||||||||
| Grade 1 | -50 | -45 | |||||||||||
Hydrostatic or Nondestructive Electric Test
Each pipe shall be subjected to the nondestructive electric test or the hydrostatic test.
Nondestructive Electric Test—Nondestructive electric tests shall be in accordance with Specification A 999/A 999M, with the following addition:
If the test signals were produced by visual imperfec- tions (listed in D), the pipe may be accepted based on visual examination, provided the imperfection is less than 0.004 in. (0.1 mm) or 12½ % of the specified wall thickness(whichever is greater).
D:
Visual Imperfections:
Scratches,
Surface roughness,
Dings,
Straightener marks,
Cutting chips,
Steel die stamps,
Stop marks, or
Pipe reducer ripple.
Product key description, this is a very good product description, detailing our product use, product characteristics


